
It's time to start on the "Rod Beams", the rod storage shelf, the dry boxes and the Decks. The rod beams, joists and dry boxes provide a lot of structure to the boat. It will stiffen up the boat once everything is epoxied into place. This will all be covered in the next number of posts.
1st Up - Build the Rod Beams
There are two rod beams that are 10' long, one each side of the boat, and the rift sawn white oak I have is 8'6". The first thing I have to do is to scarf two 6' long pieces together to make a 11' long piece. My board stretcher is busted.
I had to layout and cut scarf joints on each piece that are 8" long. I rough cut these on a jig I made for the table saw. and then made another jig to run a top bearing straight bit to fine tune the cut. (Difficult to explain without photos, sorry)
Once the cuts were made I sanded the scarfs with 80 grit to rough up the surface. I then mixed up some epoxy peanut butter and spread it on both scarf joints with an 1/8" notched trowel. I matched up the scarfs and clamped the joint together, careful not to starve the joint and squeeze out too much of the epoxy peanut butter.
The next day I took the clamps off and sanded the rod beams. I now have two 10'4" long pieces. I cut these to 10'1" long.
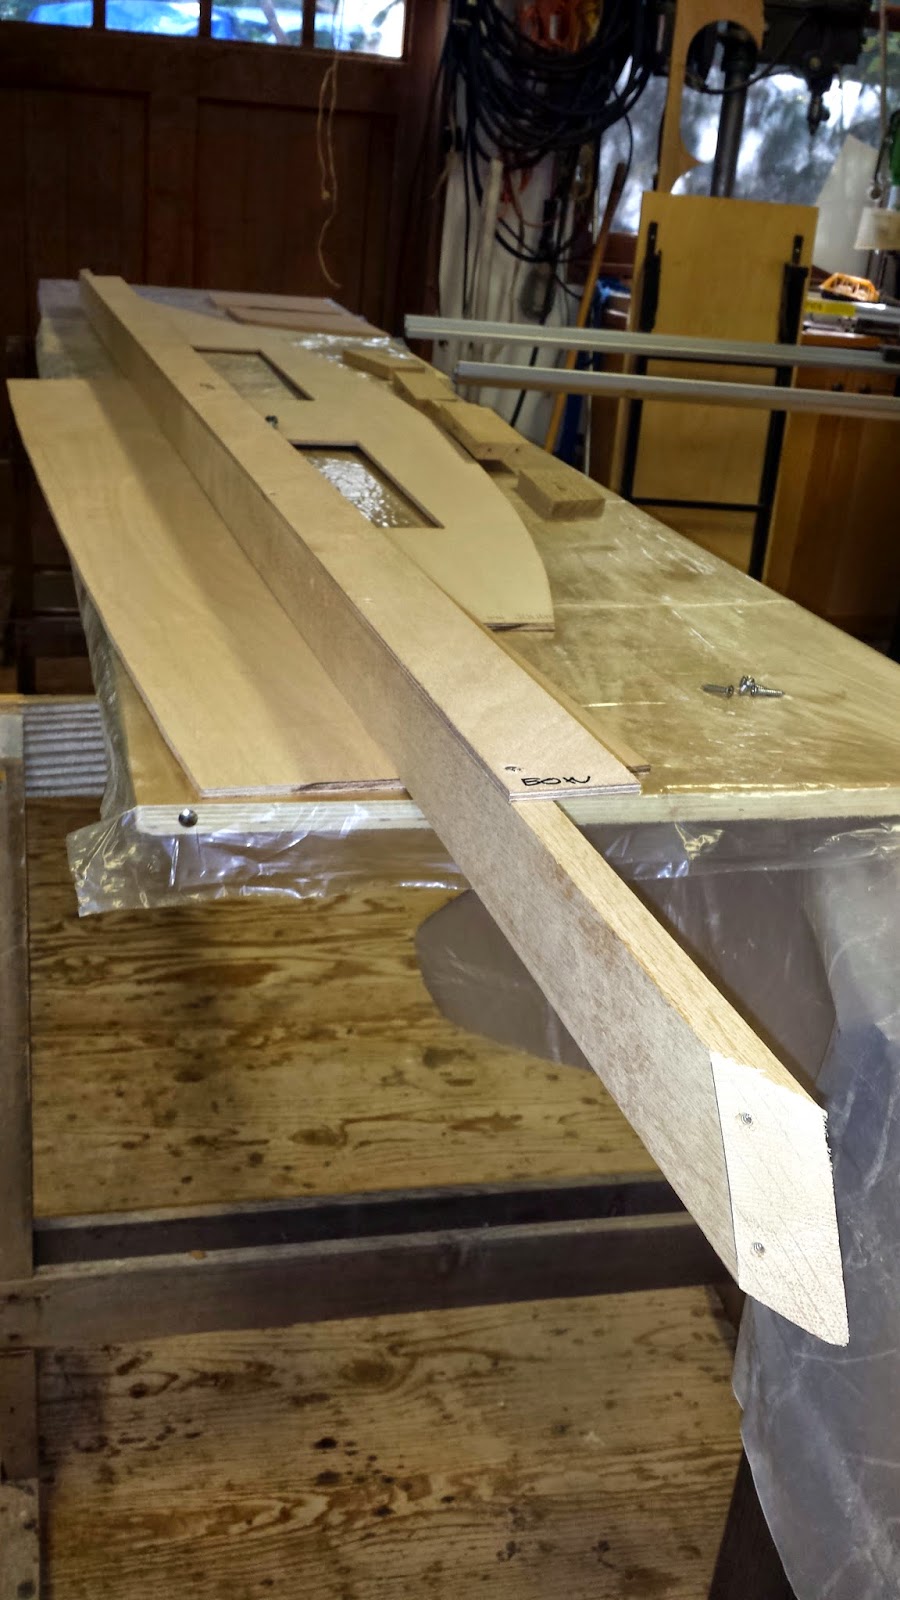
The next step is to cut 2 pieces of 1/4" Okoume plywood that are 2 1/2" wide by 8' long. These will be attached to the bottom of the rod beam forming a sort of "L". with the 1/4" piece oriented towards the interior of the boat. This 1/4" piece will become the rod holder. There will be rod storage on both sides.

This photo shows the 1/4' material that has been screwed to the bottom of the rod beam set on top of the lower temporary spreader. The 1/4" x 8' long piece is centered on the 10'long rod beam. There will eventually be a trim piece attached to the 1/4" shelf.
The 1/4" is screwed into the rod beam with 1" long stainless steel screws. These screws will be left in. and sealed with epoxy.
The rod beams with the 1/4" material attached are them placed in the boat on top of the spreaders and placed so they are touching the sides and the distance between the two rod beams measured across the boat are equal. This takes some fiddling around but once you get them parallel make a mark on top of the spreaders as a reference.
Now the rod beams must be scribed into the sides and then cut to length. The total length needs to be roughly 10' long. If they asre a little shorter once they are massaged to fit it's ok. Scribe the rod beams and then clamp the beams to a workbench and make the cuts with a Japanese pull saw. Once they are cut fine tune the cut by sanding the ends. take your time and get them to fit right.

Here's one of the ends of a rod beam scribed to fit the sides.
Once the rod beams are cut, both rod beams should be the same length and the distance between them should be the same. The two rod beams should be parallel.
When you are satisfied that the fit is correct. Take a pencil and mark around the beam ends were they meet the sides (4 locations). Remove the rod beam and drill two pilot holes from the inside to the outside. Then put the rod beams back in place and screw them in place from the outside. The screws will be temporary.
So at this point the two rod beams should be parallel and straight.

Here is a photo of one of the rod beams in place, temporarily screwed in place from the outside and sitting on both of the spreaders. The two spreaders are parallel.
No comments:
Post a Comment
Have any Questions or Comments? Let me know, Clay.